Java Agent的使用和原理
在开发工作中,除了业务逻辑的实现,我们还会添加一些辅助性代码,比如日志的打印输出,接口响应时间的统计等。一方面这些逻辑是业务无关的,另一方面这些代码可能会遍布在我们项目工程的各个地方,所以如果是手动地添加的话管理起来就会特别麻烦,那么有没有一种简单的实现方式呢?
无疑Spring的AOP提供了一种很好的思路,可以通过切面和切入点很方便地将我们的代码编织到目标位置。特别是当下基于Spring和注解驱动的”编程模式“使得这种方式使用起来更加方便了,即使是最初使用xml的那种方式使用起来也很简单,只需要在Spring的xml里边配置好aop关系就可以了
那么今天探索另外一种可能,它可以实现不修改你的工程代码和配置文件,就可以达到这个效果,这就是Java探针技术:javaagent
1、Agent工程
1.1、添加依赖
<dependency>
    <groupId>org.javassist</groupId>
    <artifactId>javassist</artifactId>
    <version>3.29.2-GA</version>
</dependency>
1.2、添加maven打包插件
<build>
  <plugins>
    <plugin>
        <groupId>org.apache.maven.plugins</groupId>
        <artifactId>maven-jar-plugin</artifactId>
        <version>3.3.0</version>
        <configuration>
            <archive>
                <!--自动添加META-INF/MANIFEST.MF -->
                <manifest>
                    <addClasspath>true</addClasspath>
                </manifest>
                <manifestEntries>
                    <Premain-Class>com.study.agent.MyFirstAgent</Premain-Class>
                    <Launcher-Agent-Class>com.study.agent.MyFirstAgent</Launcher-Agent-Class>
                    <Can-Redefine-Classes>true</Can-Redefine-Classes>
                    <Can-Retransform-Classes>true</Can-Retransform-Classes>
                </manifestEntries>
            </archive>
        </configuration>
    </plugin>
  </plugins>
</build>
1.3、Agent代码
package com.study.agent;

import com.study.transformer.PrintOutTransformer;
import java.lang.instrument.Instrumentation;

public class MyFirstAgent {

    public static void premain(String agentArgs, Instrumentation inst) {
        System.out.println("启动时加载自定义探针...");
        inst.addTransformer(new PrintOutTransformer(), true);
    }
}
1.4、transformer代码
package com.study.transformer;

import javassist.*;
import javassist.bytecode.AccessFlag;
import javassist.bytecode.AnnotationsAttribute;
import javassist.bytecode.annotation.Annotation;
import java.io.IOException;
import java.lang.instrument.ClassFileTransformer;
import java.lang.instrument.IllegalClassFormatException;
import java.security.ProtectionDomain;
import java.util.Objects;


public class PrintOutTransformer implements ClassFileTransformer {
    @Override
    public byte[] transform(ClassLoader loader, String className, Class<?> classBeingRedefined, ProtectionDomain protectionDomain, byte[] classFileBuffer) throws IllegalClassFormatException {
        //将斜杠替换为点,使之符合Java的全限定名规则
        className = className.replaceAll("/", ".");
        try {
            ClassPool pool = ClassPool.getDefault();
            CtClass cc = pool.get(className);
            CtMethod[] personFlies = cc.getDeclaredMethods();

            AnnotationsAttribute annotationsAttribute = (AnnotationsAttribute) cc.getClassFile().getAttribute(AnnotationsAttribute.visibleTag);
            Annotation annotation = annotationsAttribute.getAnnotation("org.springframework.web.bind.annotation.RestController");
            if(Objects.nonNull(annotation)){
                //借助JavaAssist工具,进行字节码插桩
                for (CtMethod personFly : personFlies) {
                    if (!Objects.equals(personFly.getModifiers(), AccessFlag.PUBLIC)){
                        //如果不是public方法,则跳过
                        continue;
                    }
                    //定义局部变量
                    personFly.addLocalVariable("_start", CtClass.longType);
                    personFly.addLocalVariable("_end", CtClass.longType);
                    //在目标方法前后,插入代码
                    personFly.insertBefore("_start = System.currentTimeMillis();");
                    personFly.insertAfter("_end = System.currentTimeMillis();System.out.println(\"接口耗时:\" + (_end-_start));", true);
                }
                cc.detach();
                return  cc.toBytecode();
            }
            return null;
        } catch (NotFoundException | CannotCompileException | IOException e) {
            throw new RuntimeException(e);
        }
    }
}
我这里是要统计所有@RestController注解标注的类的所有非静态public方法的执行时间
2、测试工程
随便准备一个SpringBoot工程即可,添加一个RestController接口方法,比如我这里:
package com.study.client.web;

import org.springframework.web.bind.annotation.GetMapping;
import org.springframework.web.bind.annotation.RequestMapping;
import org.springframework.web.bind.annotation.RestController;
import java.util.Random;
import java.util.concurrent.TimeUnit;

@RestController
@RequestMapping("/")
public class IndexController {


    @GetMapping("/hello")
    public String test(){
        System.out.println("假装在执行业务逻辑...");
        try {
            TimeUnit.MILLISECONDS.sleep(new Random().nextInt(2000));
        } catch (InterruptedException e) {
            throw new RuntimeException(e);
        }
        nested();
        System.out.println("假装执行业务逻辑结束");
        return "Hello";
    }

    public static void nested(){
        System.out.println("执行嵌套的内部逻辑");
    }
}
我这里依赖了spring-boot-starter-web,不多说
3、验证
3.1、常规启动
常规方式什么都不做启动后调用hello接口,结果自然和预想的一样,什么特殊的事情都没有发生

3.2、添加jvm参数
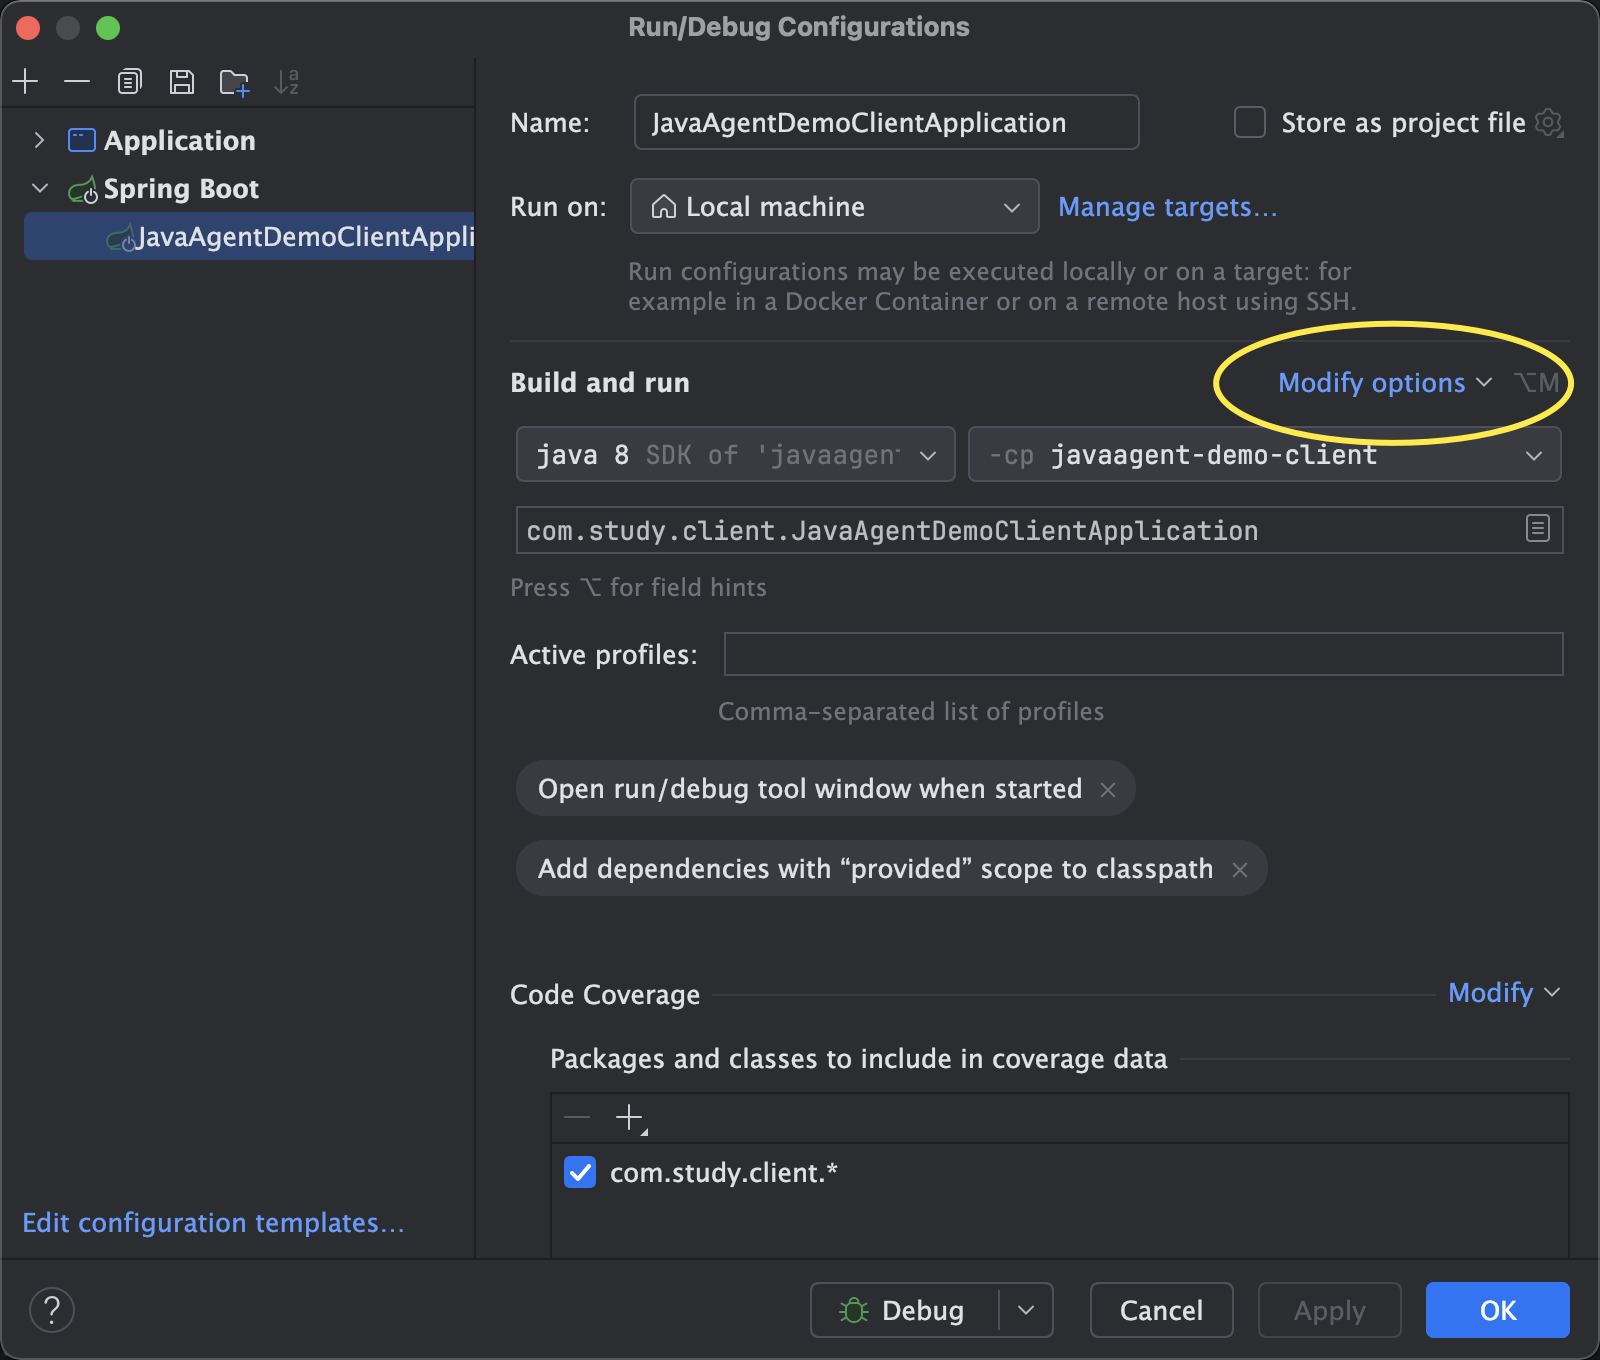
在我们的测试工程的启动类上添加一个jvm参数:
-javaagent:"/Users/navy/codes/gitee/study/javaagent-demo/target/javaagent-demo-1.0-SNAPSHOT.jar"
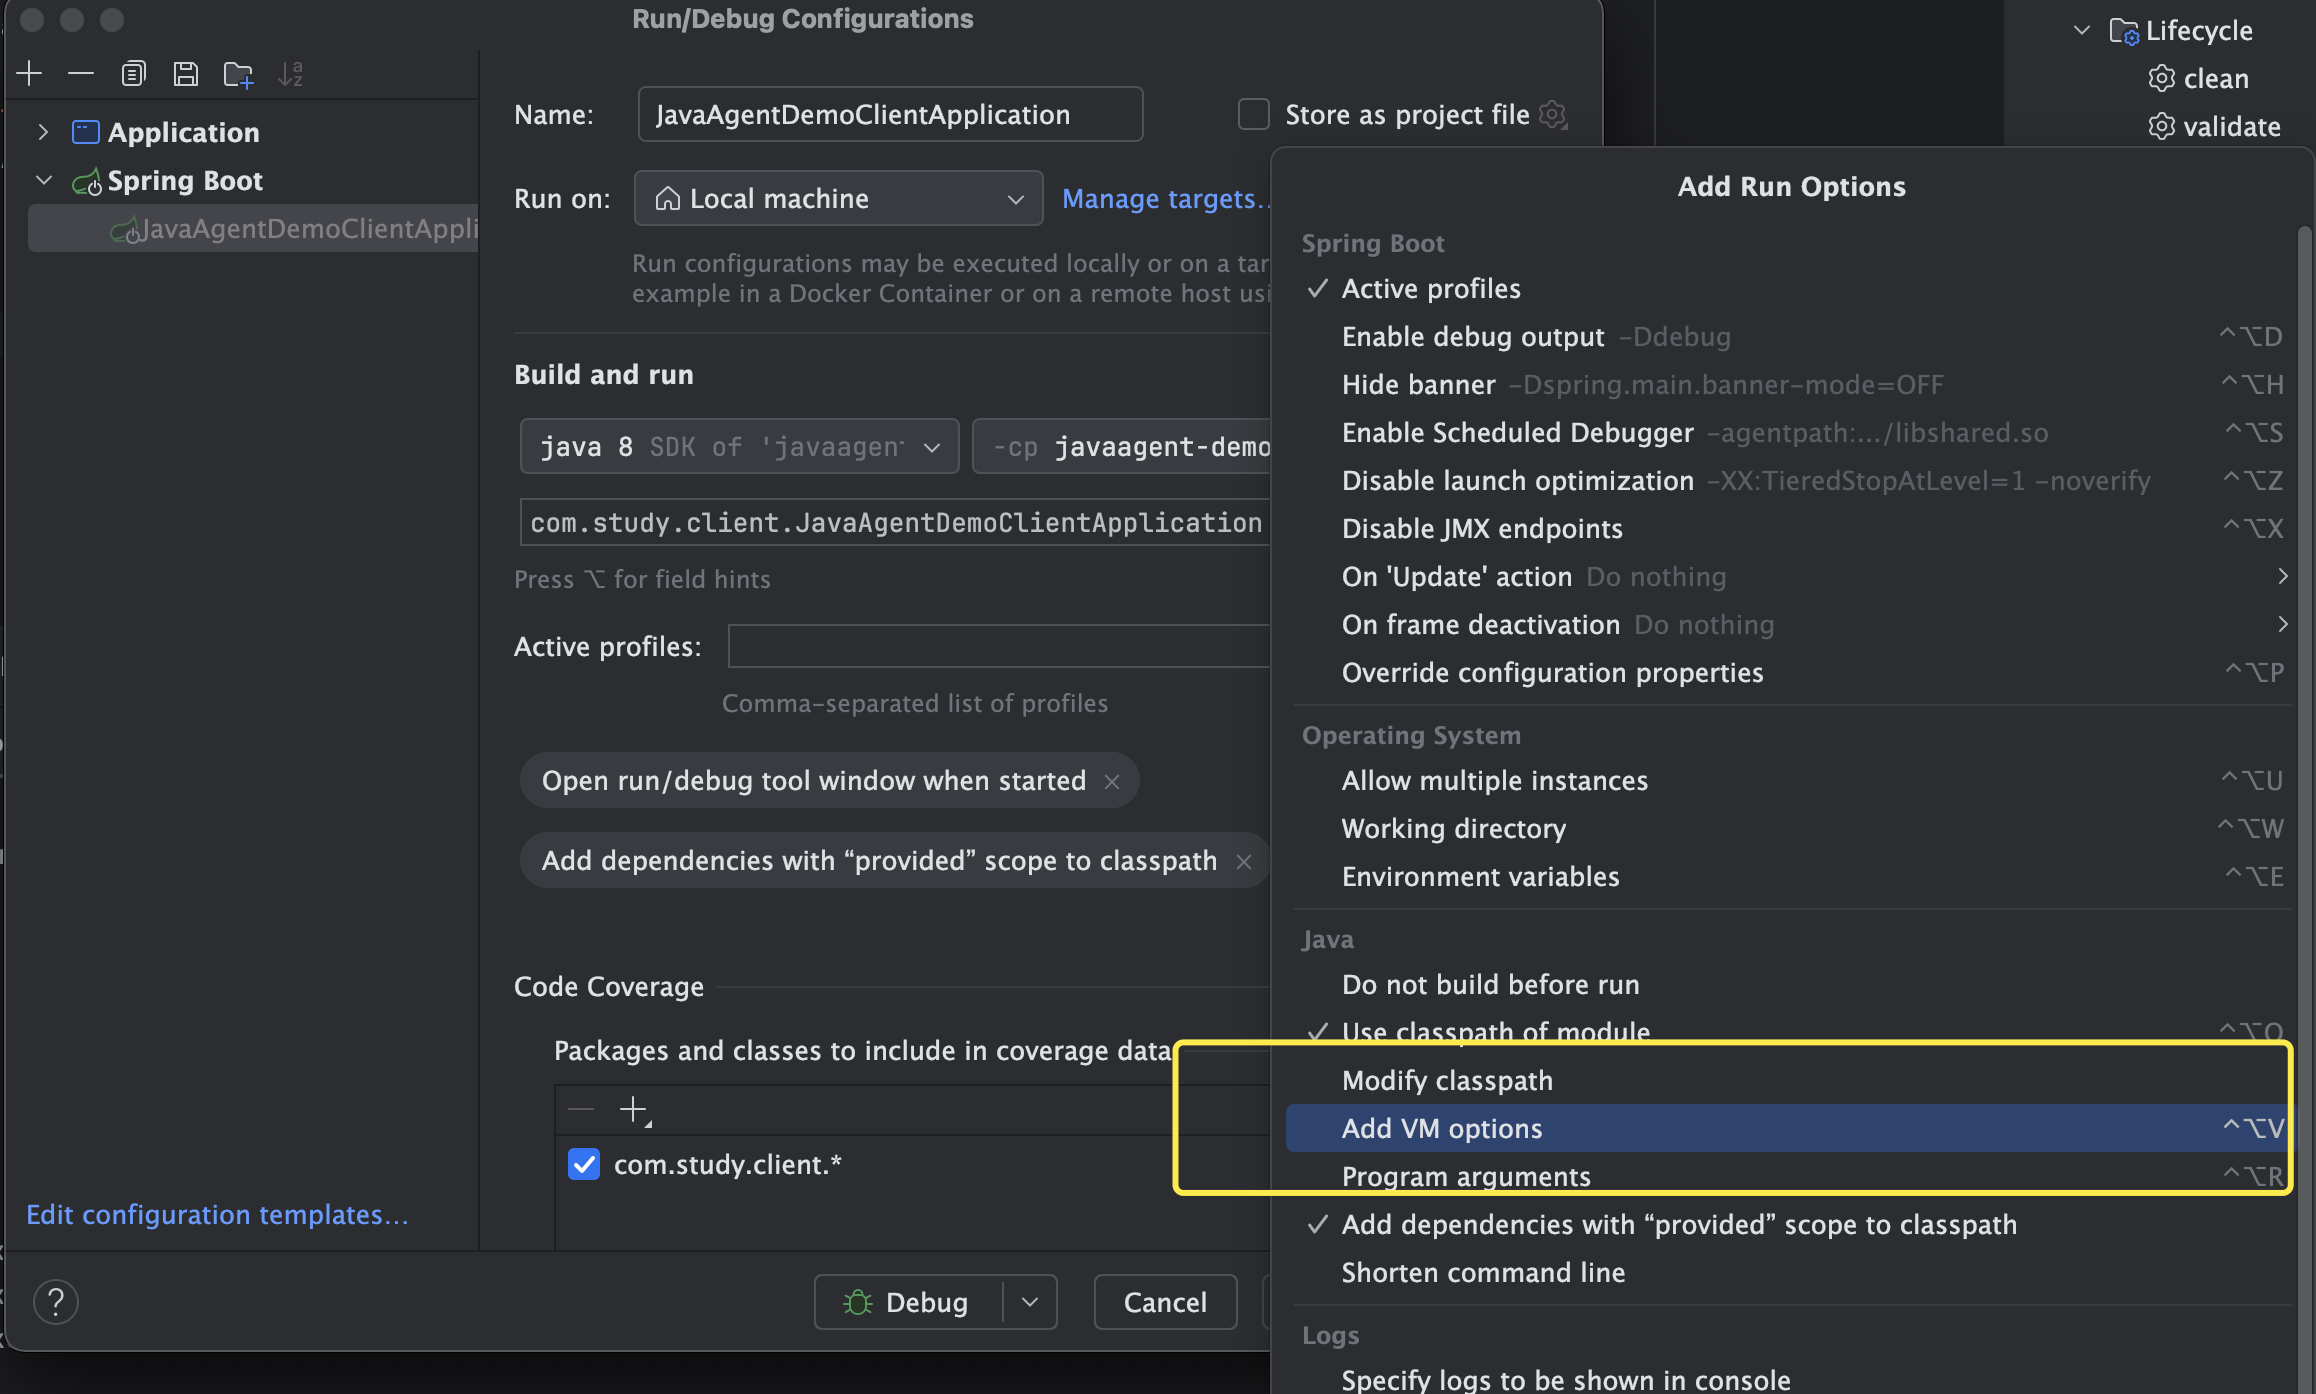
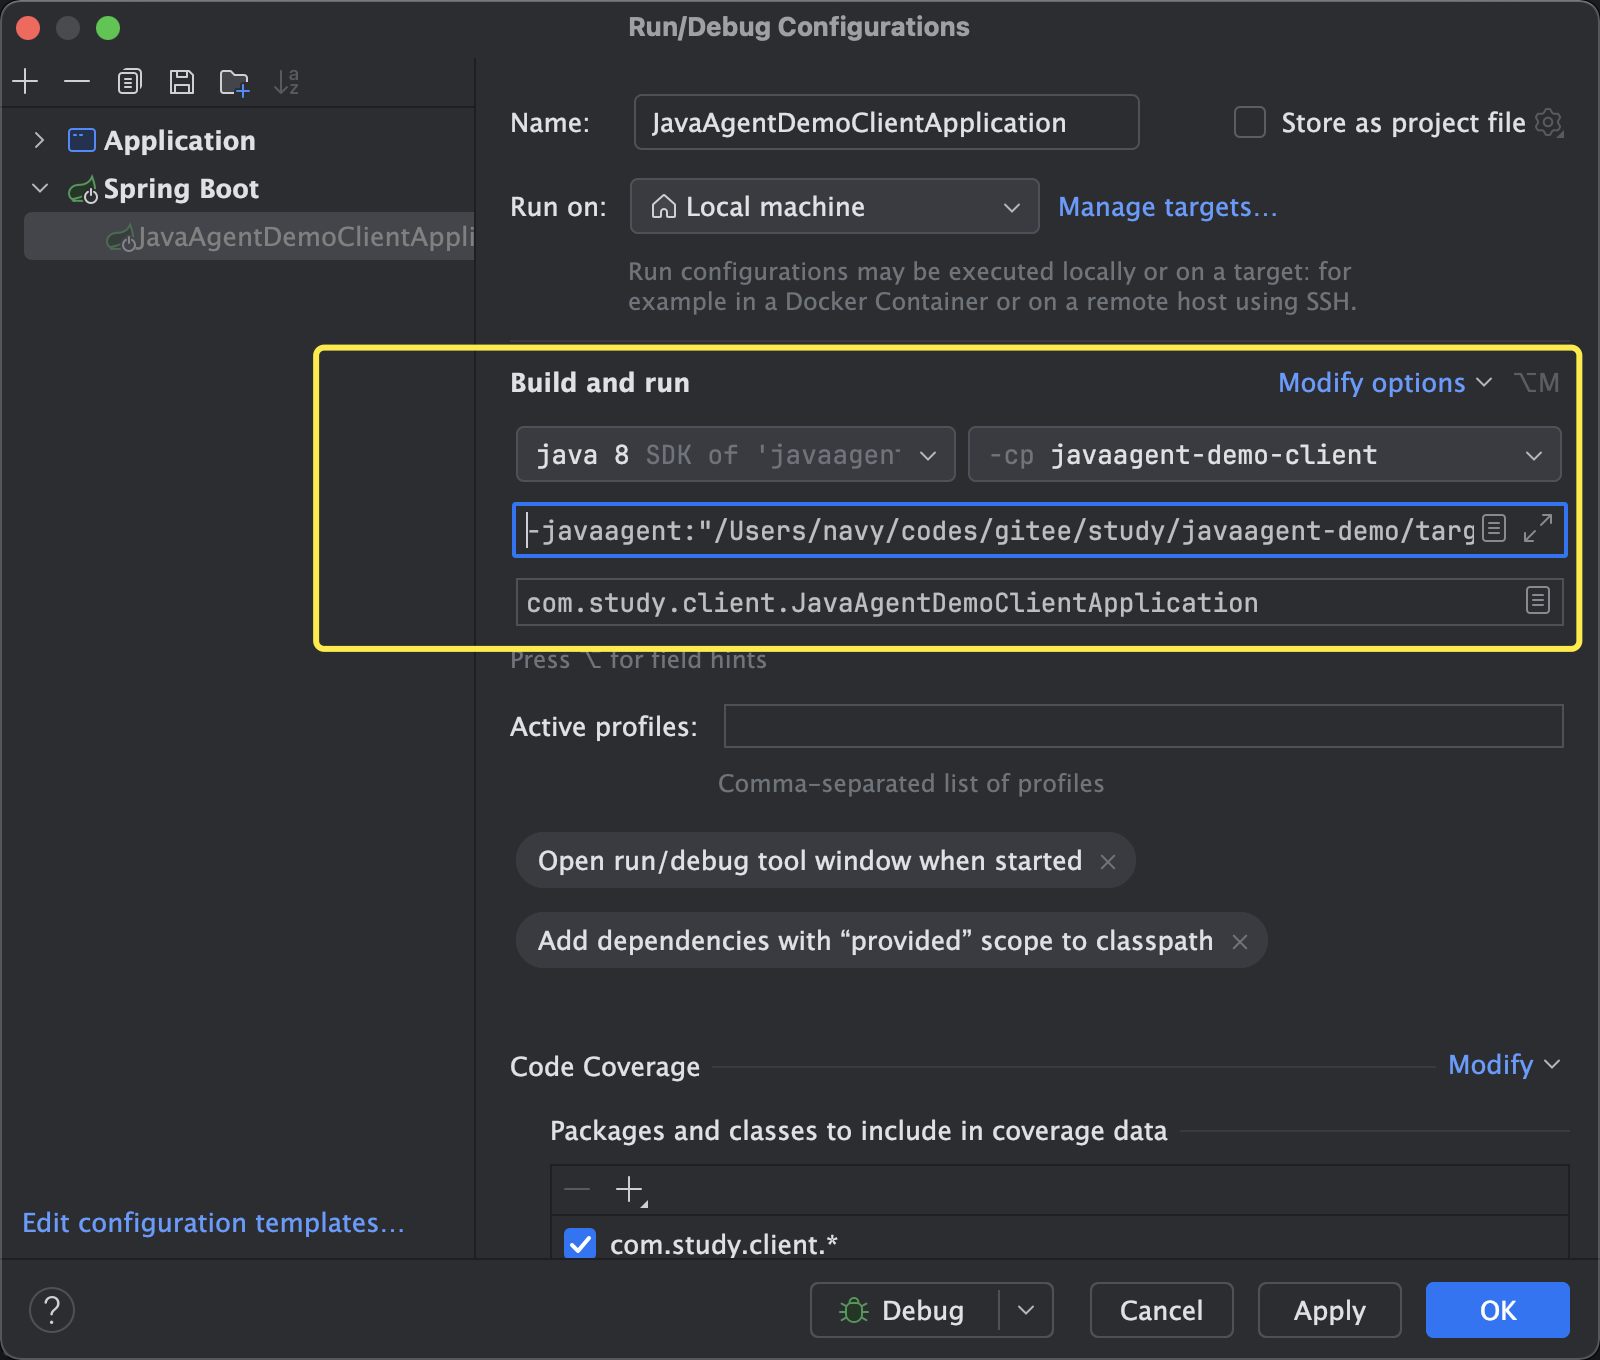
命令行启动就直接添加上面这个,如果是在IDE中启动可以这么添加:
3.3、再次调用
在启动SpringBoot测试工程之前还需要先保证我们的agent的jar包存在,所以就需要先打包前面的agent工程
配置好上面的-javaagent参数后再次运行测试工程,并调用hello接口,发现控制台打印多了一些东西

这里多了两行日志,其中一个是我们在Agent代码里添加的,一个是我们在transformer代码里想要做的接口方法响应时间的增强逻辑打印
可见我们达到了在不修改业务代码不修改配置文件的情况下,在指定的目标处植入了我们想要业务无关的附加逻辑
4、拓展
4.1、attach方式
上面的方式虽然我们实现了不动业务代码和配置的情况下的业务增强,但是可以看到有一个弊端就是需要重启,这往往在某些场景下是不太适合的,比如我要实现一个线上问题定位的小工具,这个时候不太可能让你先停服务,再加个jvm参数,然后再启动。
那怎么办呢,可以不停机直接增强吗?
有,这就是javaagent的attach方式。可以在上面代码上做一些改动
4.1.1、Agent项目的maven插件配置
<plugin>
    <groupId>org.apache.maven.plugins</groupId>
    <artifactId>maven-jar-plugin</artifactId>
    <version>3.3.0</version>
    <configuration>
        <archive>
            <!--自动添加META-INF/MANIFEST.MF -->
            <manifest>
                <addClasspath>true</addClasspath>
            </manifest>
            <manifestEntries>
              	<!-- 这里原来的<Premain-Class>变成了<Agent-Class> -->
                <Agent-Class>com.study.agent.MyFirstAgent</Agent-Class>
                <Launcher-Agent-Class>com.study.agent.MyFirstAgent</Launcher-Agent-Class>
                <Can-Redefine-Classes>true</Can-Redefine-Classes>
                <Can-Retransform-Classes>true</Can-Retransform-Classes>
            </manifestEntries>
        </archive>
    </configuration>
</plugin>
主要这里原来的 <Premain-Class> 变成了<Agent-Class>
4.1.2、Agent代码
package com.study.agent;

import com.study.transformer.PrintOutTransformer;
import java.lang.instrument.Instrumentation;

public class MyFirstAgent {

    public static void agentmain(String agentArgs, Instrumentation inst) {
        System.out.println("动态加载自定义探针...");
        inst.addTransformer(new PrintOutTransformer(), true);
        Class[] allLoadedClasses = inst.getAllLoadedClasses();
        for (Class clazz : allLoadedClasses) {
            Annotation[] declaredAnnotations = null;
            try {
                declaredAnnotations = clazz.getDeclaredAnnotations();
                if (isAnnotationPresent("org.springframework.web.bind.annotation.RestController", declaredAnnotations)) {
                    //重新转换已经加载的目标类,使其生效
                    inst.retransformClasses(clazz);
                }
            } catch (Exception e) {
                //do nothing
            }
        }
    }

    private static boolean isAnnotationPresent(String annotation, Annotation[] annotationArr) {
        if(Objects.isNull(annotationArr)) {
            return false;
        }
        for (Annotation ann : annotationArr) {
            return annotation.equals(ann.annotationType().getName());
        }
        return false;
    }
}
这里之前是premain方法,现在是agentmain
4.1.3、添加一个attach测试代码
负责将我们的agent植入到目标进程
package com.study.attach;

import com.sun.tools.attach.*;
import java.io.IOException;
import java.util.List;

public class AgentAttachDemo {

    public static void main(String[] args) throws IOException, AttachNotSupportedException, AgentLoadException, AgentInitializationException, InterruptedException {
        List<VirtualMachineDescriptor> vm = VirtualMachine.list();
        for (VirtualMachineDescriptor vmd : vm) {
            if ("com.study.client.JavaAgentDemoClientApplication".equals(vmd.displayName())){
                System.out.println("注入探针");
                VirtualMachine virtualMachine = VirtualMachine.attach(vmd.id());
                virtualMachine.loadAgent("/Users/navy/codes/gitee/study/javaagent-demo/target/javaagent-demo-1.0-SNAPSHOT.jar");
                virtualMachine.detach();
            }
        }
    }
}
这里需要一个jdk的tools.jar依赖
<dependency>
    <groupId>com.sun</groupId>
    <artifactId>tools</artifactId>
    <version>1.8</version>
    <scope>system</scope>
    <systemPath>${java.home}/../lib/tools.jar</systemPath>
</dependency>
但是对于jdk9及以上的jdk是没有tools.jar这个文件的,VirtualMachine这些API属于jdk内部API,设计者不希望外部去调用,所以给隐藏了,想要开启就需要在工程的编译插件添加一个配置,如我这里用的jdk22:
<build>
  <plugins>
    <plugin>
      <groupId>org.apache.maven.plugins</groupId>
      <artifactId>maven-compiler-plugin</artifactId>
      <version>3.8.0</version>
      <configuration>
        <source>22</source>
        <target>22</target>
        <compilerArgs>
          <arg>--add-exports</arg>
          <arg>jdk.attach/com.sun.tools.attach=ALL-UNNAMED</arg>
        </compilerArgs>
      </configuration>
    </plugin>
  </plugins>
</build>
4.1.4、测试验证
- 打包agent工程
- 去掉SpringBoot测试工程的jvm参数
- 运行SpringBoot测试工程
不添加jvm参数直接运行SpringBoot测试项目,并调用hello接口

可以看到没有耗时的日志输出,正常,因为还没植入呢
- 运行attach测试工程
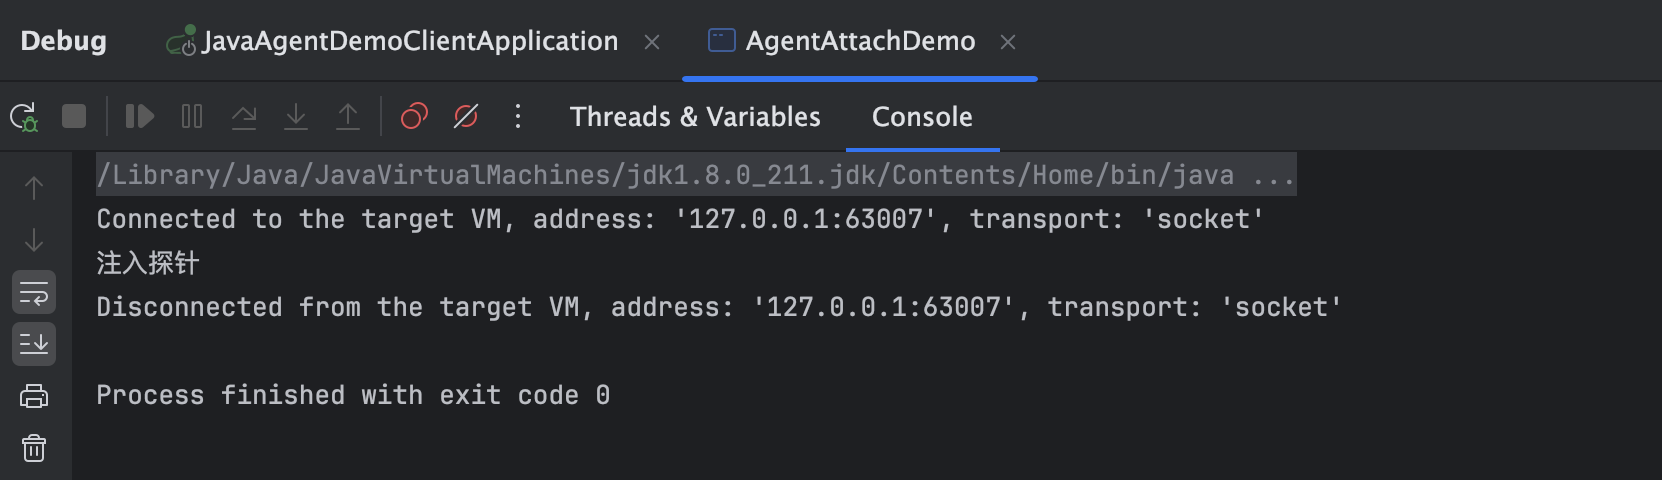

可以看到我们agent代码里agentmain方法里的打印信息已经有了,也就是说我们的探针已经植入进去了,到底有没有达到效果呢?再调一些hello接口试一下

这不就有了嘛,完美
4.2、开源产品
其实市面上有很多工具都是基于探针技术实现的,最常见的比如链路追踪和监控的skywalking,以及阿里开源的线上问题排查工具arthas
所以弄懂javaagent技术还是很有用的,甚至你也可以为自己去量身打造一款随身工具箱,岂不美哉~
代码链接:
https://gitee.com/qknavy/study.git