1、Pulsar的单机模式与集群模式安装以及Java客户端消息生产消费的初体验
简介:
Apache Pulsar 是 Apache 软件基金会顶级项目,是下一代云原生分布式消息流平台,集消息、存储、轻量化函数式计算为一体。该系统源于 Yahoo,最初在Yahoo 内部开发和部署,支持 Yahoo 应用服务平台 140 万个主题,日处理超过 1000 亿条消息。Pulsar 于 2016 年由 Yahoo 开源并捐赠给 Apache 软件基金会进行孵化,2018 年成为 Apache 软件基金会顶级项目。
Pulsar 作为下一代云原生分布式消息流平台,支持多租户、持久化存储、多机房跨区域数据复制,具有强一致性、高吞吐以及低延时的高可扩展流数据存储特性,内置诸多其他系统商业版本才有的特性,是云原生时代解决实时消息流数据传输、存储和计算的最佳解决方案。
Pulsar架构图:
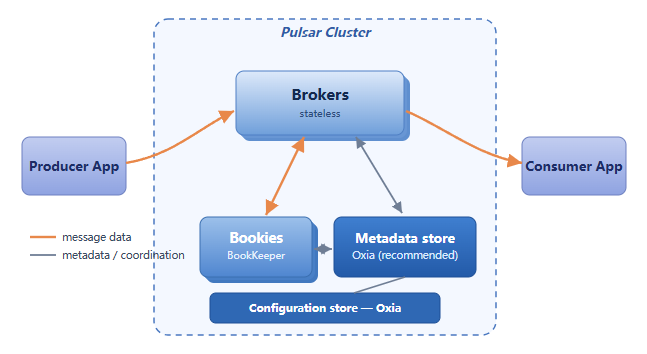
pulsar官网地址:https://pulsar.apache.org/docs/5.0.x/
下载地址:https://www.apache.org/dyn/closer.lua/pulsar/pulsar-5.0.0-M1/apache-pulsar-5.0.0-M1-bin.tar.gz
wget https://dlcdn.apache.org/pulsar/pulsar-5.0.0-M1/apache-pulsar-5.0.0-M1-bin.tar.gz
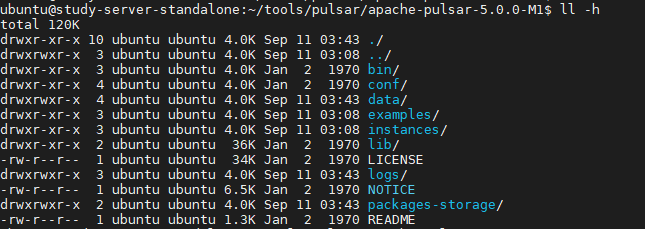
解压之后目录格式如下:
1、pulsar单机模式安装
1.1、启动
pulsar的单机模式非常简单,只需要将下载下来的二进制包解压之后执行一个命令即可:
# 解压
tar -zxf apache-pulsar-5.0.0-M1-bin.tar.gz

# 启动
cd apache-pulsar-5.0.0-M1/
./bin/pulsar standalone
携带
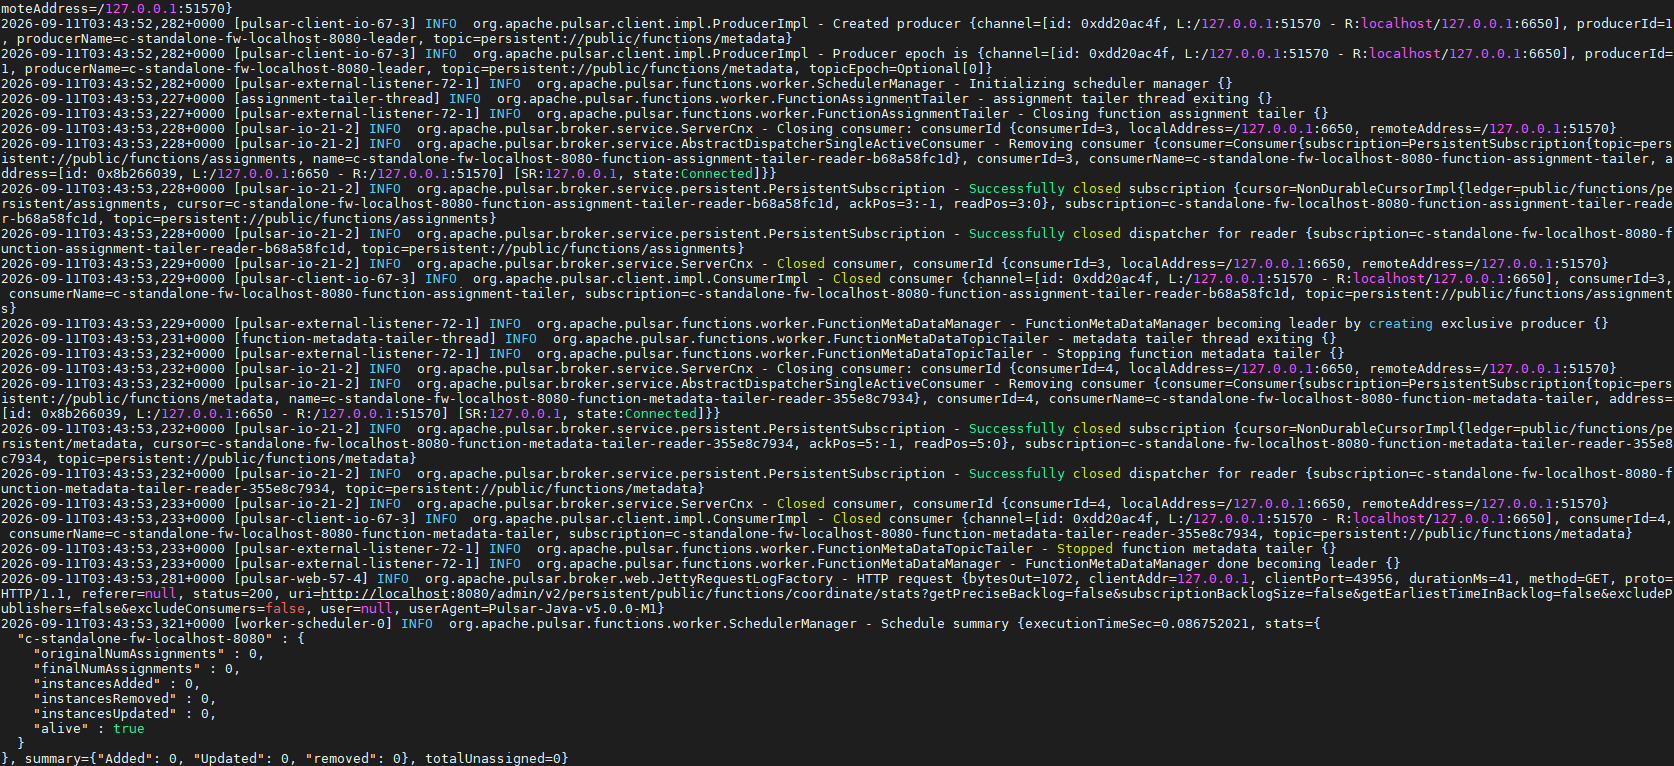
standalone参数明确指定以单机模式运行,可以观察控制台日志输出
注意:
目前启动的方式是前台启动,命令一旦退出,pulsar服务也就停止了,如果要进行其它操作的话需要单独再开一个命令行窗口。
如果服务要使用后台运行,可以执行./bin/pulsar daemon start standalone命令,作为后台进程运行的pulsar如果要停止使用,可以通过./bin/pulsar daemon stop standalone命令停止服务
1.2、消息发送与消费
pulsar提供了一个客户端工具,在pulsar启动成功之后,我们可以用这个工具验证一下消息是否能够正常发送和消费
1.2.1、启动消费者
执行下面命令启动一个消费者:
./bin/pulsar-client consume hello-world -s "first-subscription"

1.2.2、生产者发送一条消息
执行下面命令启动一个生产者,并往队列hello-world发送一条内容为Hi, my name is Navy的消息:
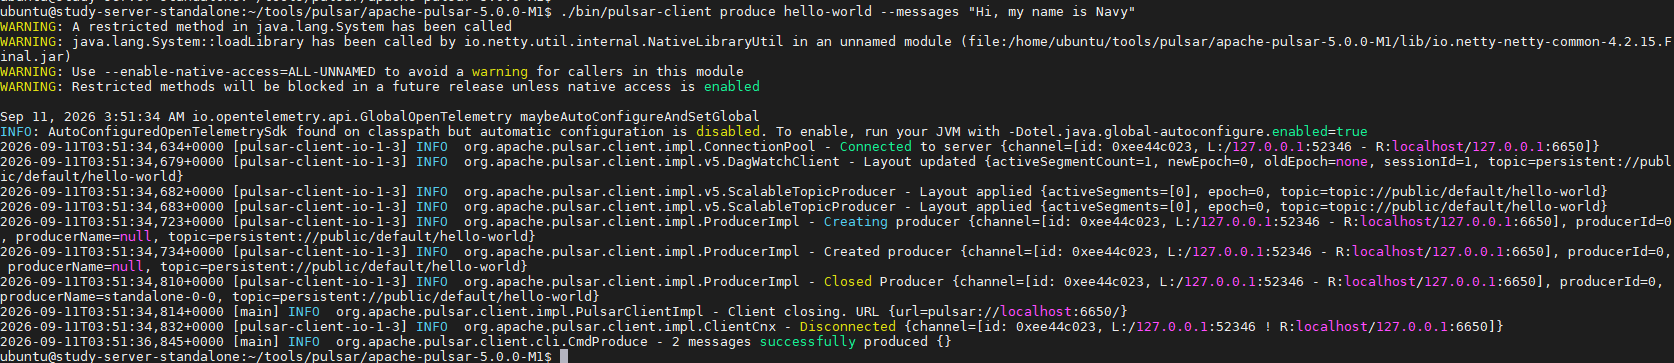
./bin/pulsar-client produce hello-world --messages "Hi, my name is Navy"
可以看到,消息发送成功:
回看消费者控制台打印的日志,可以看到消息也正常收到了
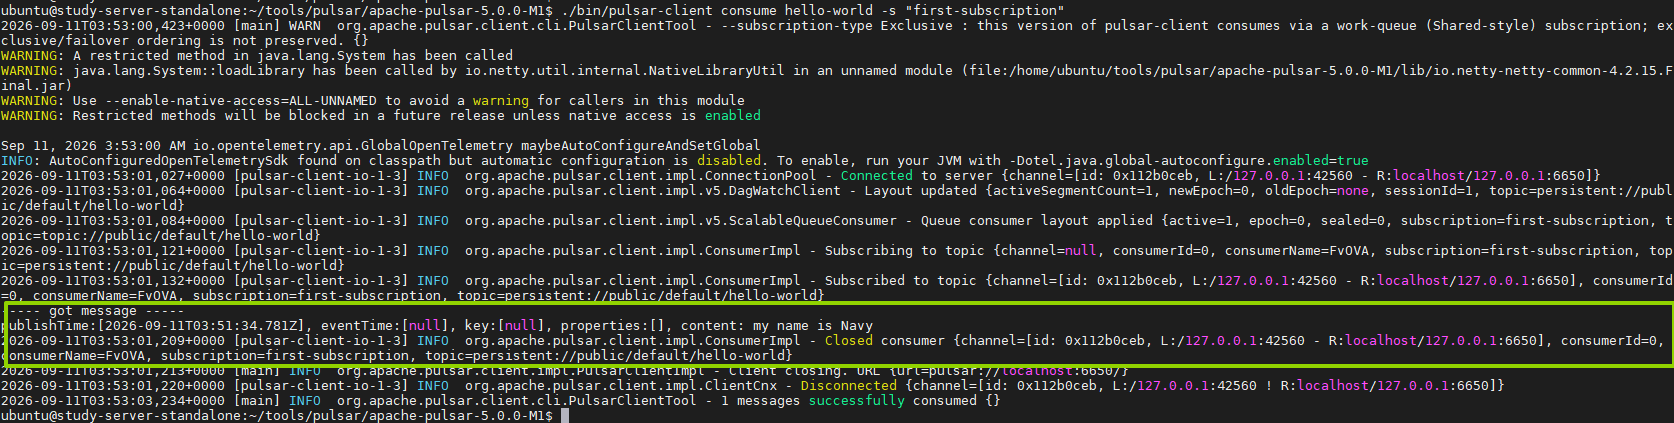
与此同时,我们发现消费端在收到一条消息之后就会自动退出,这个有点zookeeper的watch订阅,那么这个客户端到底是如何实现消息订阅的呢?后续文章再慢慢研究
2、集群模式安装
2.1、资源规划
| 主机 | zookeeper(1主2从) | bookie | broker |
|---|---|---|---|
| 192.168.0.61 | 2181 | 6650 | 18080 |
| 192.168.0.62 | 2181 | 6650 | 18080 |
| 192.168.0.63 | 2181 | 6650 | 18080 |
2.2、zookeeper集群搭建
2.2.1、下载 & 解压
# 下载
wget https://archive.apache.org/dist/zookeeper/stable/apache-zookeeper-3.8.6-bin.tar.gz

# 解压
tar -zxf apache-zookeeper-3.8.6-bin.tar.gz

# 进入zk目录
cd ./apache-zookeeper-3.8.6-bin
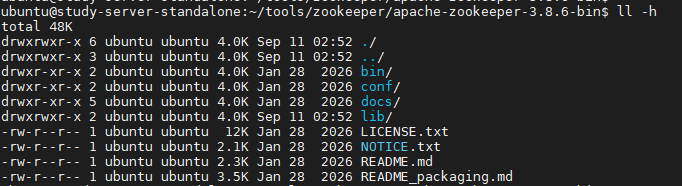
目录结构如下图所示:
2.2.2、修改配置文件
进入conf目录,复制一份zoo_sample.cfg并命名为zoo.cfg
cp zoo_sample.cfg zoo.cfg
修改文件内容:
# The number of milliseconds of each tick
tickTime=2000
# The number of ticks that the initial
# synchronization phase can take
initLimit=10
# The number of ticks that can pass between
# sending a request and getting an acknowledgement
syncLimit=5
# the directory where the snapshot is stored.
# do not use /tmp for storage, /tmp here is just
# example sakes.
dataDir=/home/ubuntu/tools/zookeeper/apache-zookeeper-3.8.6-bin/data
# the port at which the clients will connect
clientPort=2181
# the maximum number of client connections.
# increase this if you need to handle more clients
#maxClientCnxns=60
#
# Be sure to read the maintenance section of the
# administrator guide before turning on autopurge.
#
# https://zookeeper.apache.org/doc/current/zookeeperAdmin.html#sc_maintenance
#
# The number of snapshots to retain in dataDir
#autopurge.snapRetainCount=3
# Purge task interval in hours
# Set to "0" to disable auto purge feature
#autopurge.purgeInterval=1

## Metrics Providers
#
# https://prometheus.io Metrics Exporter
#metricsProvider.className=org.apache.zookeeper.metrics.prometheus.PrometheusMetricsProvider
#metricsProvider.httpHost=0.0.0.0
#metricsProvider.httpPort=7000
#metricsProvider.exportJvmInfo=true
server.1=192.168.0.61:2888:3888
server.2=192.168.0.62:2888:3888
server.3=192.168.0.63:2888:3888
主要修改内容:
- dataDir:指定数据目录
- server.{id}:指定集群三个节点的地址:host:port:port
2.2.3、myid文件
在数据目录创建myid文件,文件内容为ip对应的server id,比如192.168.0.61上面的myid文件内容是1
2.2.4、启动zookeeper
执行命令启动zookeeper:
./bin/zkServer.sh start
可以看到zookeeper服务启动成功

2.2.5、验证集群状态
zookeeper服务启动成功之后,可以通过命令查看一下三个节点的服务状态:
192.168.0.61:

192.168.0.62:

192.168.0.63:

从上面可以看出zk集群已经成功启动起来了,其中一个节点成为了leader,另外两个成为了follower
2.3、初始化集群元数据
2.3.1、初始化元数据
在任意zookeeper节点上执行:
# 进入Apache-pulsar 目录,执行命令初始化集群元数据
./bin/pulsar initialize-cluster-metadata \
--cluster pulsar-cluster \
--zookeeper 192.168.0.61:2181,192.168.0.62:2181,192.168.0.63:2181 \
--configuration-store 192.168.0.61:2181,192.168.0.62:2181,192.168.0.63:2181 \
--web-service-url http://192.168.0.61:18080,192.168.0.62:18080,192.168.0.63:18080 \
--web-service-url-tls https://192.168.0.61:8443,192.168.0.62:8443,192.168.0.63:8443 \
--broker-service-url pulsar://192.168.0.61:6650,192.168.0.62:6650,192.168.0.63:6650 \
--broker-service-url-tls pulsar+ssl://192.168.0.61:6651,192.168.0.62:6651,192.168.0.63:6651
| 标记 | 说明 |
|---|---|
| --cluster | 集群名字 |
| --zookeeper | A "local" ZooKeeper connection string for the cluster. This connection string only needs to include one machine in the ZooKeeper cluster. |
| --configuration-store | 整个集群实例的配置存储连接字符串。 As with the --zookeeper flag, this connection string only needs to include one machine in the ZooKeeper cluster. |
| --web-service-url | The web service URL for the cluster, plus a port. This URL should be a standard DNS name. The default port is 8080 (you had better not use a different port). |
| --web-service-url-tls | If you use TLS, you also need to specify a TLS web service URL for the cluster. The default port is 8443 (you had better not use a different port) |
| --broker-service-url | Broker服务的URL,用于与集群中的brokers进行交互。 这个 URL 不应该使用和 web 服务 URL 同样的 DNS名称,而应该是用pulsar 方案。 默认端口是6650(我们不建议使用其他端口)。 |
| --broker-service-url-tls | 如果使用TLS,你必须为集群指定一个 TLS web 服务URL,以及用于集群中 broker TLS 服务的URL。 默认端口是6651(不建议使用其它端口) |
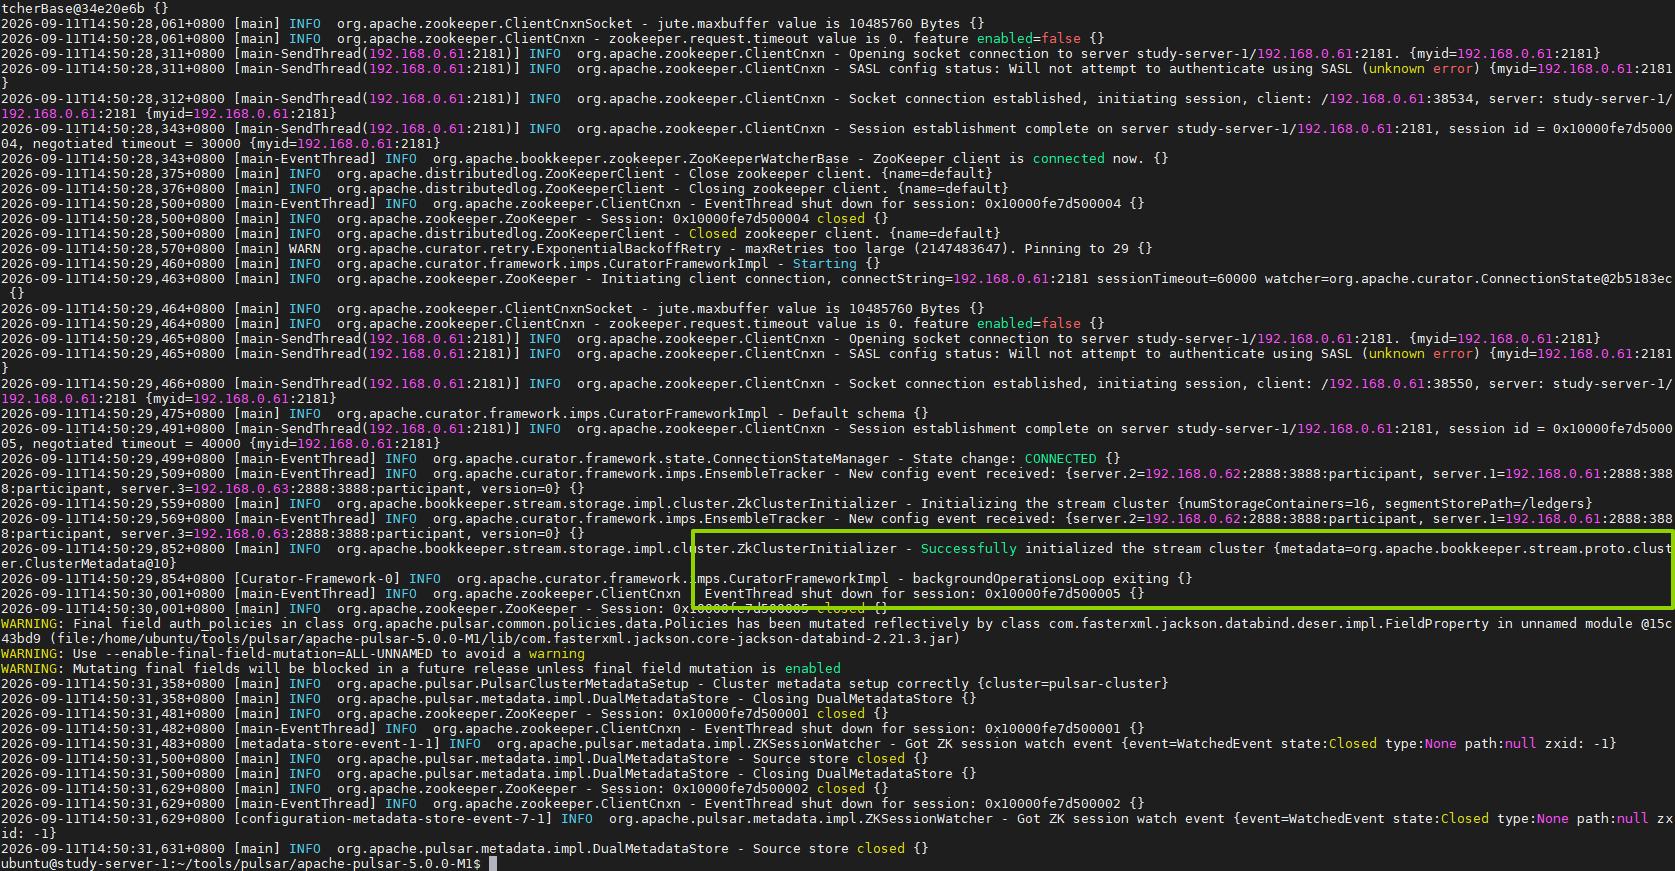
控制台输出:
2.3.2、验证初始化结果
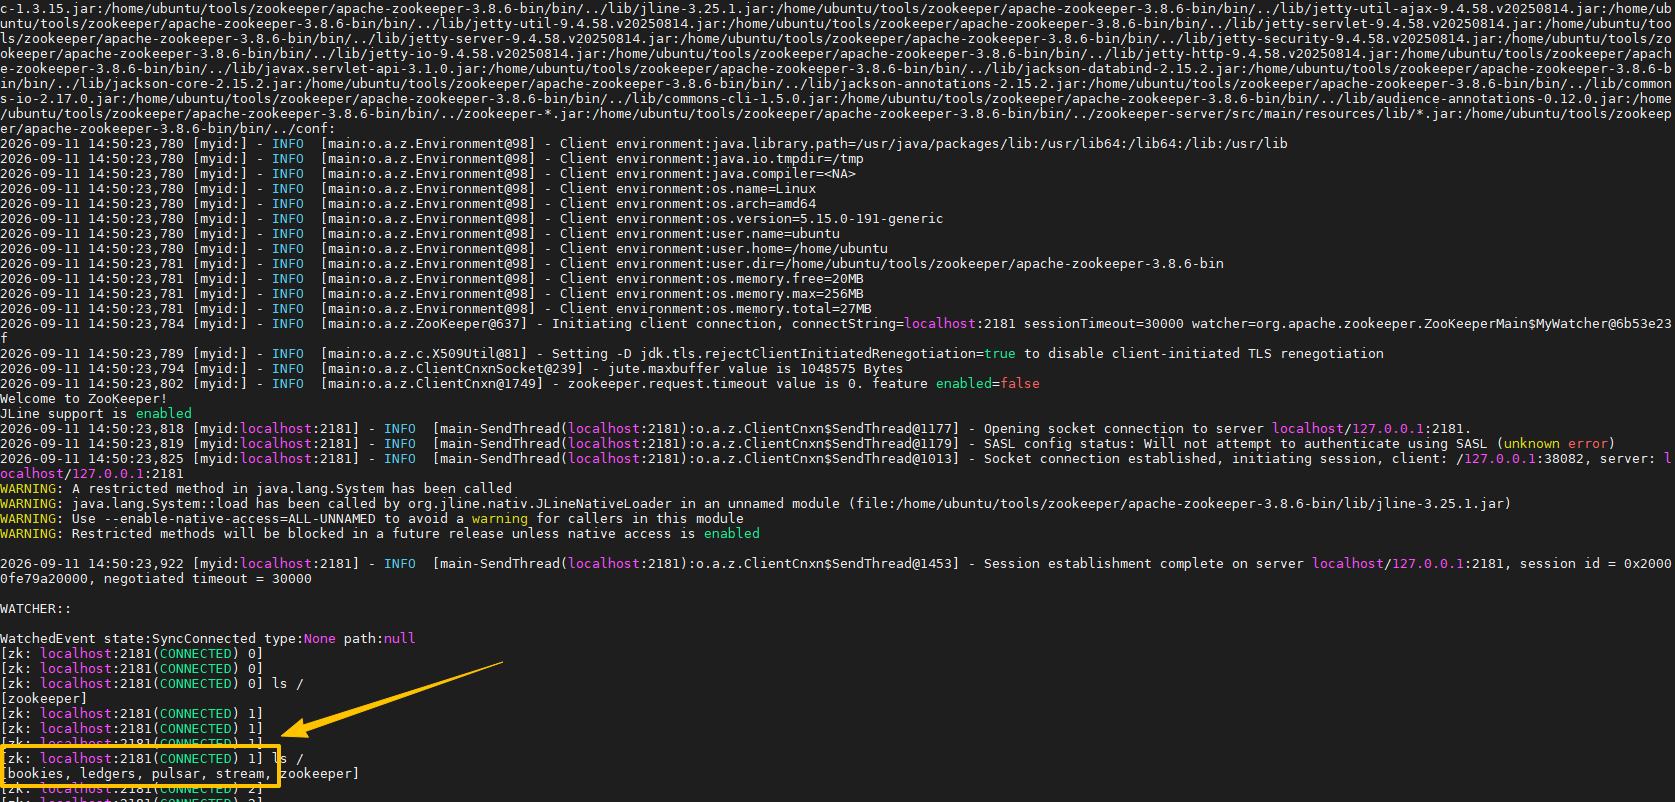
进入zk,查看元数据是否正确而写入:
./bin/zkCli.sh
2.4、配置Bookeeper集群
2.4.1、修改配置文件
通过修改三个节点上的配置文件 conf/bookkeeper.conf 去配置 BookKeeper bookies。 配置 bookies 最重要的一步,是要确保 zkServers 设置为 Zookeeper 集群的连接信息
zkServers=192.168.0.61:2181,192.168.0.62:2181,192.168.0.63:2181
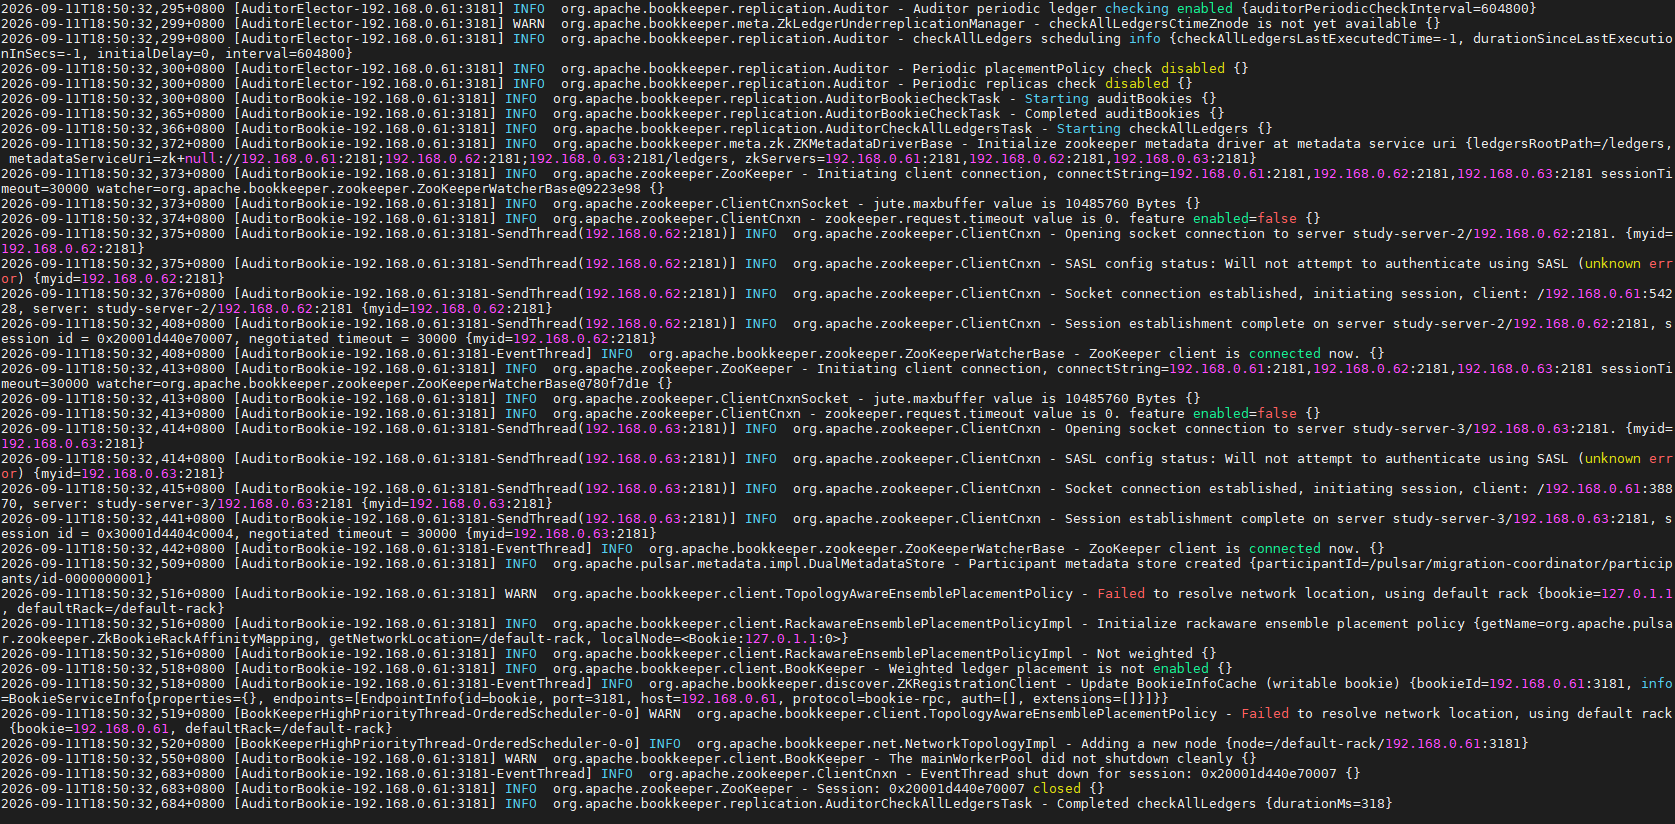
2.4.2、启动bookie集群
# 以后台进程启动bookie
./bin/pulsar-daemon start bookie


# 如果要看启动日志可以采用前台启动方式
./bin/pulsar bookie
2.4.3、验证bookie是否启动成功
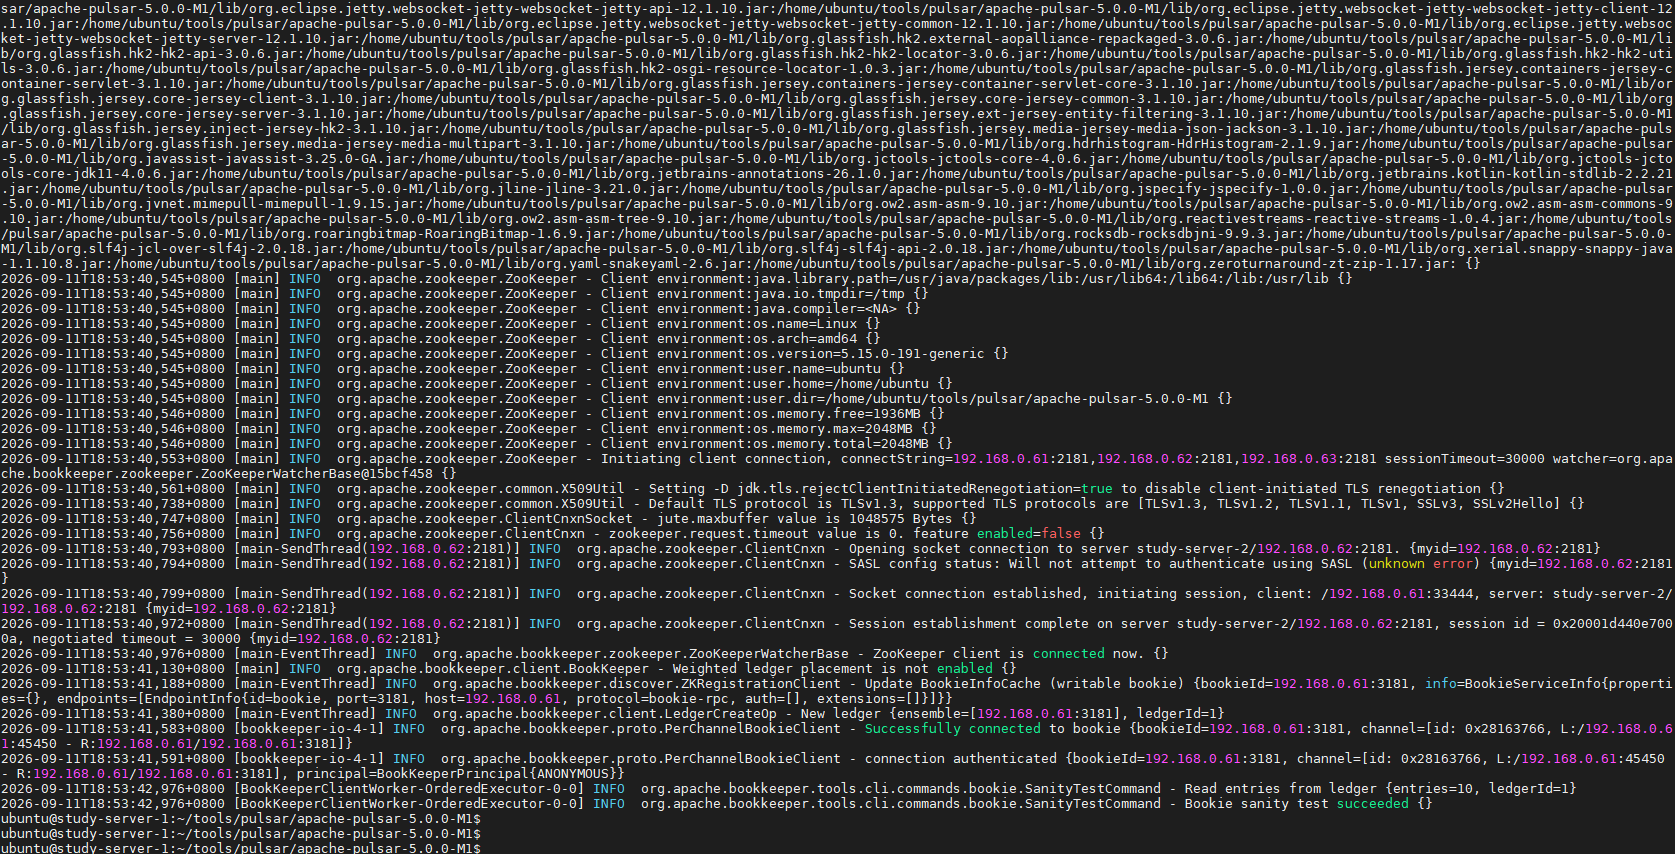
./bin/bookkeeper shell bookiesanity
控制台输出:
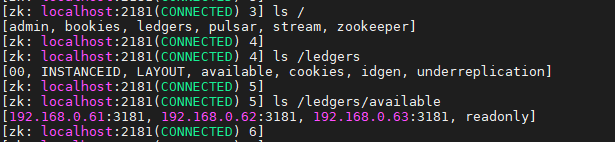
三个节点都正常启动bookie后,查看zk上的节点信息,可以看到三个节点都正常注册上去了:
2.5、启动broker集群
2.5.1、修改broker配置文件
修改conf/broker.conf文件,主要几处修改:
- webServicePort=18080,前面在初始化元数据的时候指定的是18080端口,默认的8080端口
- advertisedAddress={ip}
- clusterName=pulsar-cluster
- zookeeperServers=192.168.0.61:2181,192.168.0.62:2181,192.168.0.63:2181
- configurationStoreServers=192.168.0.61:2181,192.168.0.62:2181,192.168.0.63:2181
2.5.2、启动broker
在三个节点上分别执行下面命令,启动broker
# 以后台进程启动 broker
./bin/pulsar-daemon start broker

# 查看集群 brokers 节点情况(broker启动需要一定的时间)
./bin/pulsar-admin --admin-url http://192.168.0.61:18080 brokers list pulsar-cluster
可以看到控制台已经将三个节点已经列出来了:

2.6、验证集群发送消息和消费消息
2.6.1、启动一个消费者
./bin/pulsar-client consume hello-world -s "second-subscription"

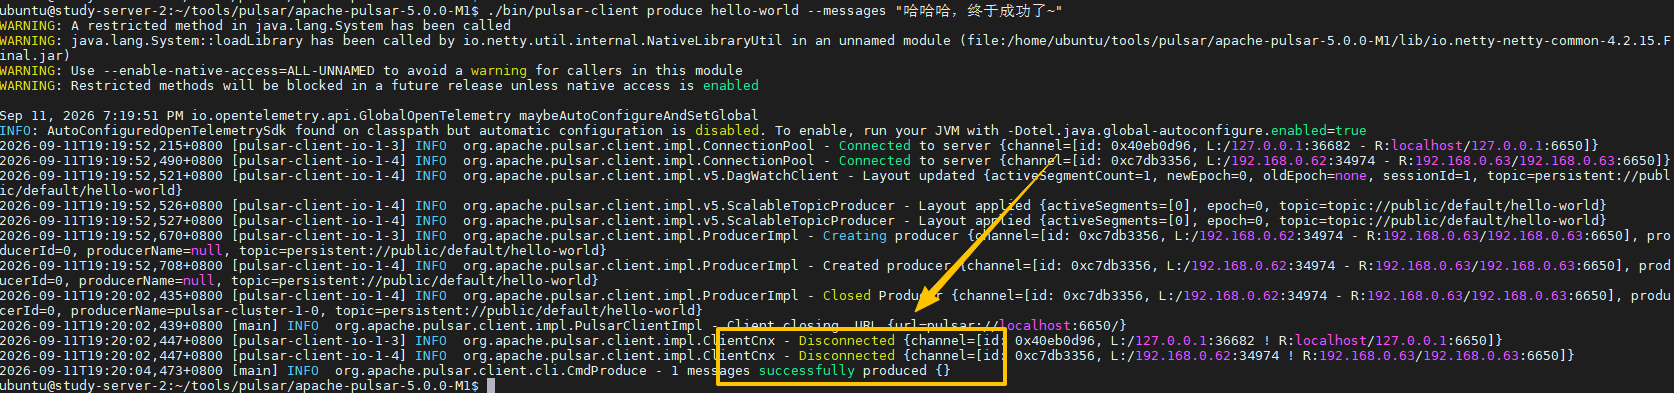
2.6.2、生产者发送一条消息
./bin/pulsar-client produce hello-world --messages "哈哈哈,终于成功了~"
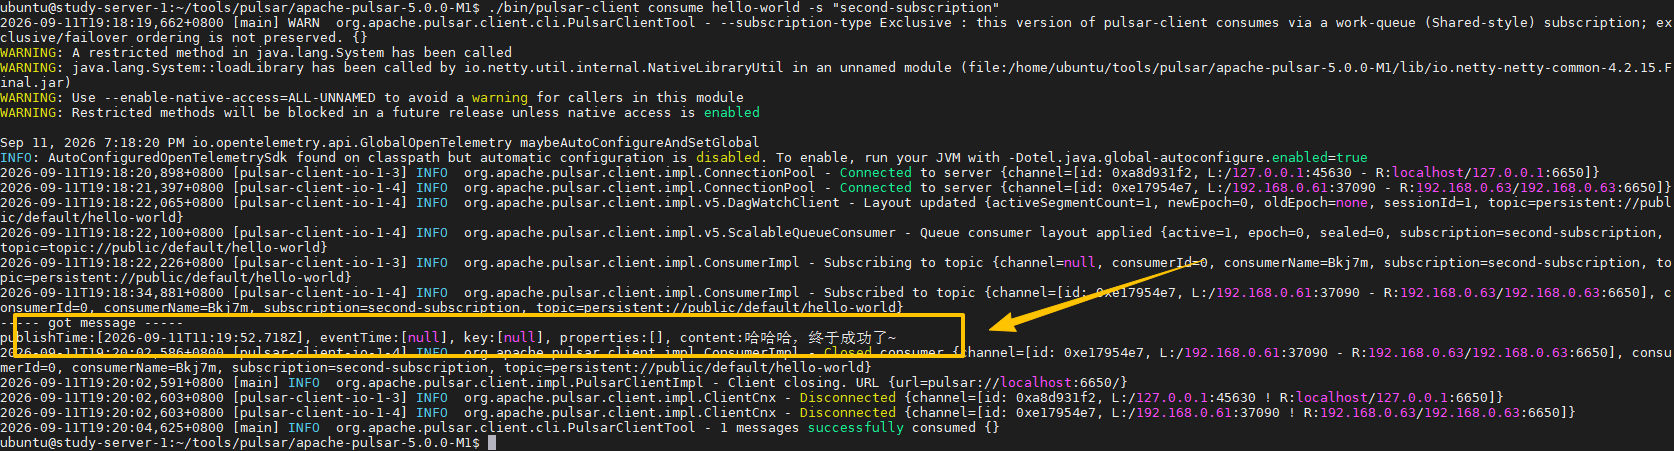
回看消费者控制台,可以看到消息已经成功接收到了:
3、图形管理界面安装
上面我们部署了一个单机pulsa以及一个额pulsa集群,但是在演示消息发送和消费都是在命令行控制台操作的,使用起来非常不方便,接下来就安装一个图形管理界面Pulsar admin manger
为了操作简单,直接用docker的方式运行
3.1、docker启动容器
docker run -d --name pulsar-manager \
  -p 9527:9527 -p 7750:7750 \
  -e SPRING_CONFIGURATION_FILE=/pulsar-manager/pulsar-manager/application.properties \
  apachepulsar/pulsar-manager:latest
如果这个镜像拉取不下来,也可以用我自己保存的:registry.cn-hangzhou.aliyuncs.com/xhsx/pulsar-manager:latest

3.2、账号初始化
我是在192.168.0.61这台机子上运行的,IP不同自己替换一下:
CSRF_TOKEN=$(curl http://192.168.0.61:7750/pulsar-manager/csrf-token)

curl \
   -H 'X-XSRF-TOKEN: $CSRF_TOKEN' \
   -H 'Cookie: XSRF-TOKEN=$CSRF_TOKEN;' \
   -H "Content-Type: application/json" \
   -X PUT http://192.168.0.61:7750/pulsar-manager/users/superuser \
   -d '{"name": "admin", "password": "apachepulsar", "description": "test", "email": "username@test.org"}'
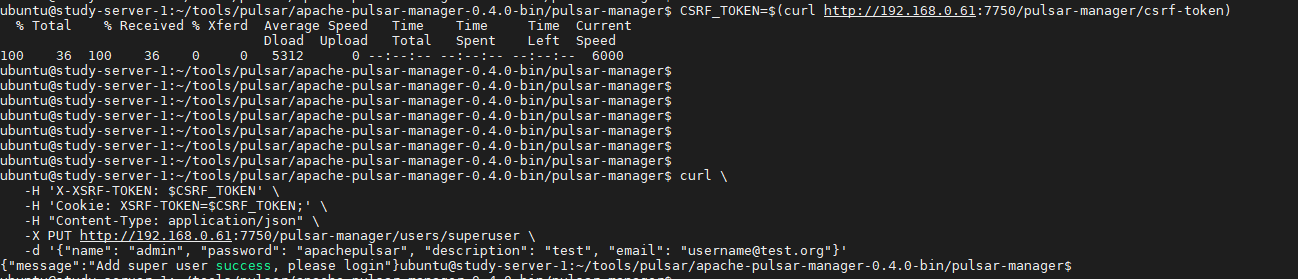
控制台提示成功后就可以用上面设置的账号admin和密码apachepulsar登录了
登录地址:http://192.168.0.61:9527,登录成功后是一个光秃秃的界面,需要手动添加我们的pulsar集群环境

3.3、添加环境
点击“添加环境”将我们前面创建的pulsar集群添加进来,需要填写环境名称、service url以及bookie url,可以参照着来:
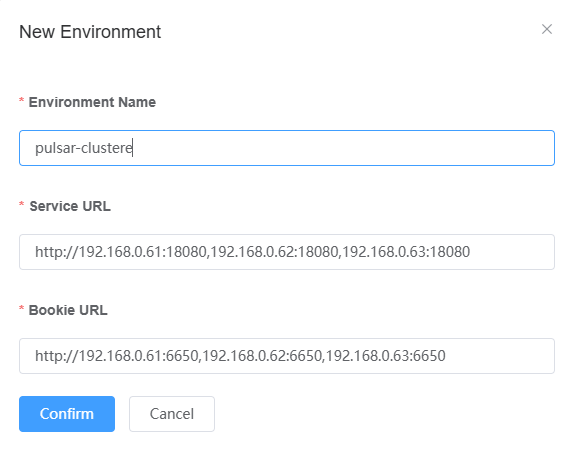
填写完成后确认提交

点击对应环境名称就可以对对应环境进行管理了
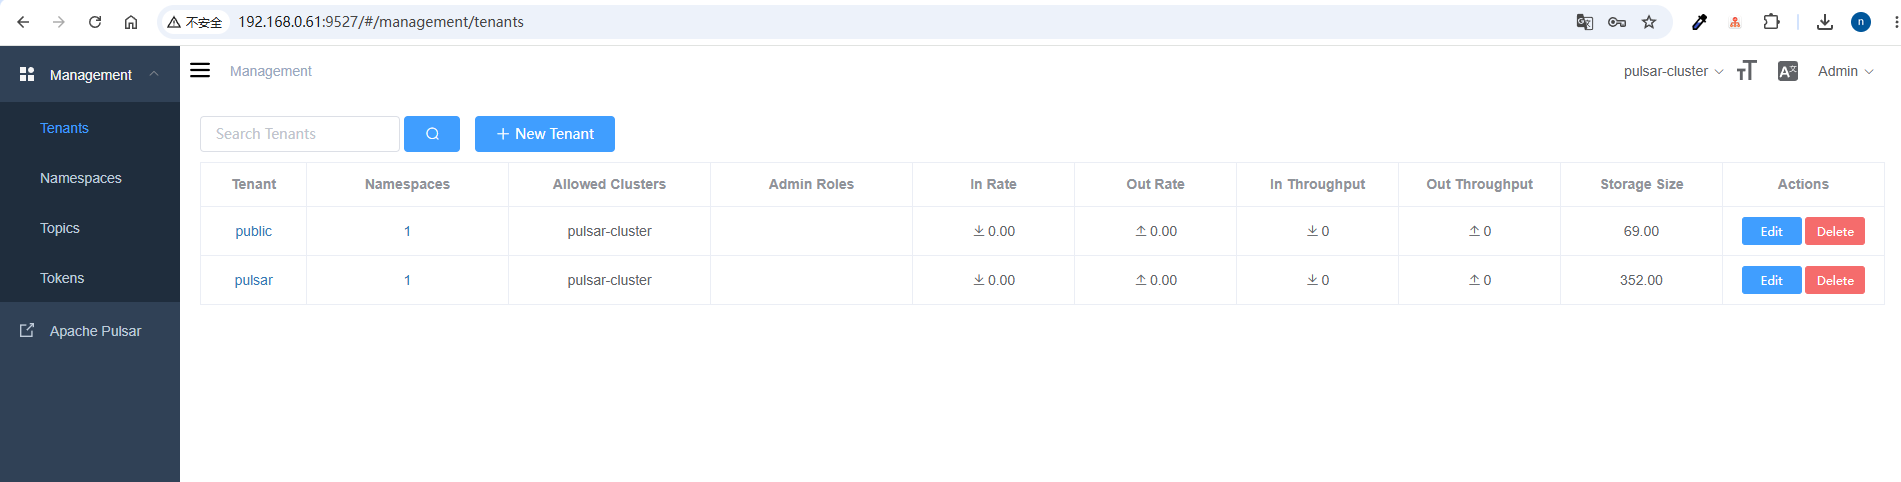
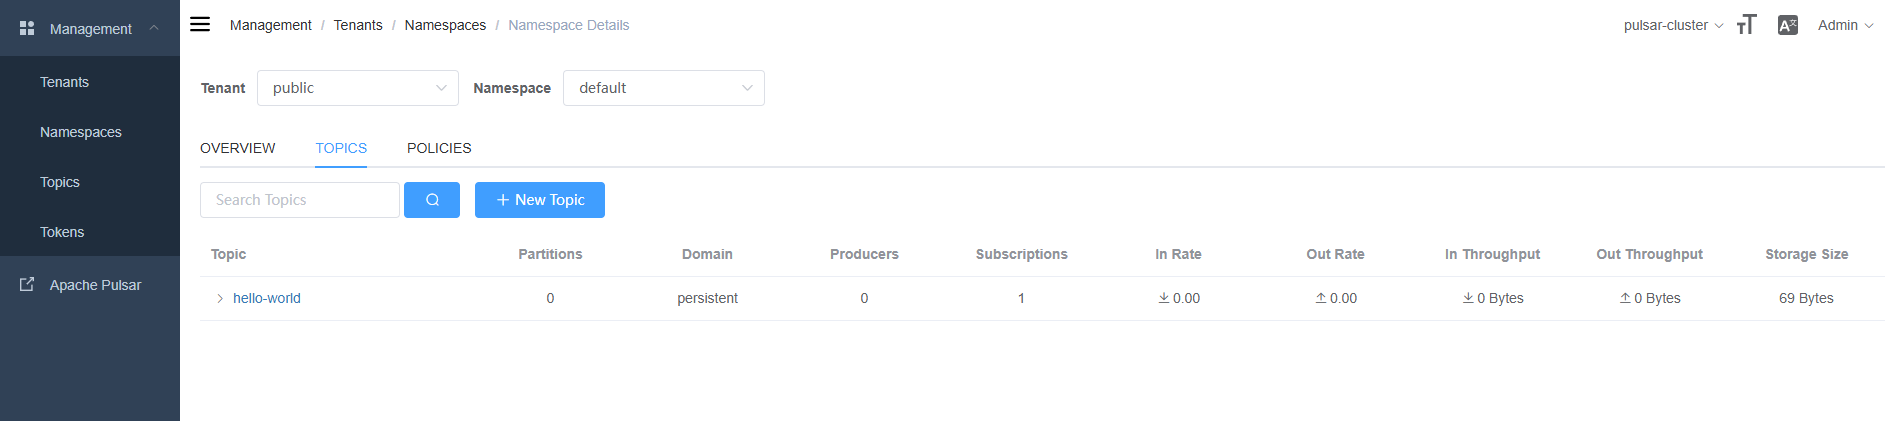
查看主题,可以看到之前用到的topic也在,至此,我们的pulsar集群搭建顺利完成~
4、Java客户端使用
前面我们已经将pulsar集群成功运行起来了,接下来通过一个简单的demo演示一下pulsar通过Java客户端进行消息生产和消费
4.1、引入依赖
<dependency>
    <groupId>org.apache.pulsar</groupId>
    <artifactId>pulsar-client</artifactId>
    <version>4.0.13</version>
</dependency>
4.2、消费者端
import org.apache.pulsar.client.api.Consumer;
import org.apache.pulsar.client.api.Message;
import org.apache.pulsar.client.api.PulsarClient;
import org.apache.pulsar.client.api.SubscriptionType;
import java.util.concurrent.TimeUnit;

public class PulsarConsumer {

    private static final String SERVER_URL = "pulsar://192.168.0.61:6650,192.168.0.62:6650,192.168.0.63:6650";

    public static void main(String[] args) throws Exception {
        // 构造Pulsar Client
        PulsarClient client = PulsarClient.builder()
                .serviceUrl(SERVER_URL)
                .enableTcpNoDelay(true)
                .build();

        Consumer consumer = client.newConsumer()
                .consumerName("pulsar-consumer")
                .topic("persistent://public/default/hello-world")
                .subscriptionName("my-first-subscription")
                .ackTimeout(10, TimeUnit.SECONDS)
                .maxTotalReceiverQueueSizeAcrossPartitions(10)
                .subscriptionType(SubscriptionType.Exclusive)
                .subscribe();
        do {
            // 接收消息有两种方式:异步和同步
            // CompletableFuture<Message<String>> message = consumer.receiveAsync();
            Message message = consumer.receive();
            System.out.println(String.format("接收到消息[messageId=%s, messageKey=%s, content=%s, properties=%s]",
                    message.getMessageId().toString(),
                    message.getKey(),
                    new String(message.getData()),
                    message.getProperties().toString()
                    ));
            // 消息确认
            consumer.acknowledge(message);
        } while (true);
    }
}
上面在通过pulsarClient对象获取一个消费者对象的时候设置了订阅类型(subscriptionType),这个值对应有四个选项:
- Exclusive:相同topic下相同的订阅名称只有一个消费者,比如用用户服务订阅了订单支付的topic,由于用户服务可能有多个实例,如果选择这个值,意味着只有用户服务的一个实例能够订阅订单支付的topic的消息,其它实例会订阅失败
- Failover:相同的topic下相同订阅名称可以有多个消费者,但是只有一个消费者能够收到消息
- Key_Shared:相同的topic下相同订阅名称可以有多个消费者,但是相同key的消息只会被发送到一个消费者
- Shared:相同的topic下相同订阅名称可以有多个消费者,消息会以轮询的方式发发送到所有订阅的消费者
pulsar提供了同步(receive)和异步(receiveAsync)获取消息的方式
4.3、生产者端
import org.apache.pulsar.client.api.MessageId;
import org.apache.pulsar.client.api.Producer;
import org.apache.pulsar.client.api.PulsarClient;
import org.apache.pulsar.client.api.Schema;
import java.util.concurrent.CompletableFuture;
import java.util.concurrent.TimeUnit;

public class PulsarProducer {

    private static final String SERVER_URL = "pulsar://192.168.0.61:6650,192.168.0.62:6650,192.168.0.63:6650";

    public static void main(String[] args) throws Exception {
        // 构造Pulsar Client
        PulsarClient client = PulsarClient.builder()
                .serviceUrl(SERVER_URL)
                .enableTcpNoDelay(true)
                .build();
        // 构造生产者
        Producer<String> producer = client.newProducer(Schema.STRING)
                .producerName("pulsar-producer")
                .topic("persistent://public/default/hello-world")
                .batchingMaxMessages(1024)
                .batchingMaxPublishDelay(10, TimeUnit.MILLISECONDS)
                .enableBatching(true)
                .blockIfQueueFull(true)
                .maxPendingMessages(512)
                .sendTimeout(10, TimeUnit.SECONDS)
                .blockIfQueueFull(true)
                .create();
        // 同步发送消息
        MessageId messageId = producer.send("你好呀,pulsar!");
        System.out.println("消息ID:" + messageId);

        CompletableFuture<MessageId> asyncMessageId = producer.sendAsync("这是一条异步消息");
        // 阻塞线程,直到返回结果
        System.out.println("异步消息ID = " + asyncMessageId.get());

        // 配置发送的消息元信息,同步发送
        producer.newMessage()
                .key("my-message-key")
                .value("配置消息元数据同步发送消息")
                .property("my-key", "my-value")
                .property("my-other-key", "my-other-value")
                .send();
        producer.newMessage()
                .key("my-async-message-key")
                .value("配置消息元数据异步发送消息")
                .property("my-async-key", "my-async-value")
                .property("my-async-other-key", "my-async-other-value")
                .sendAsync();

        // 关闭producer的方式有两种:同步和异步
        // producer.closeAsync();
        producer.close();

        // 关闭licent的方式有两种,同步和异步
        // client.close();
        client.closeAsync();
    }
}
这里一共发送了四条消息,两条普通方式发送的消息和两个设置消息元信息的方式发送的消息。并且可以看到发送消息的方式和关闭生产者、客户端的方式都有同步和异步两个,可以根据具体的情况酌情选择,需要注意的是如果选择异步发送消息的话,需要确认在生产者或者客户端关闭之前消息已经正确发送出去了,否则消息可能会丢失。
比如上面的示例代码如果我们先运行消费端,然后再执行生产者代码,有可能发现消费端控制台只收到了3条消息:
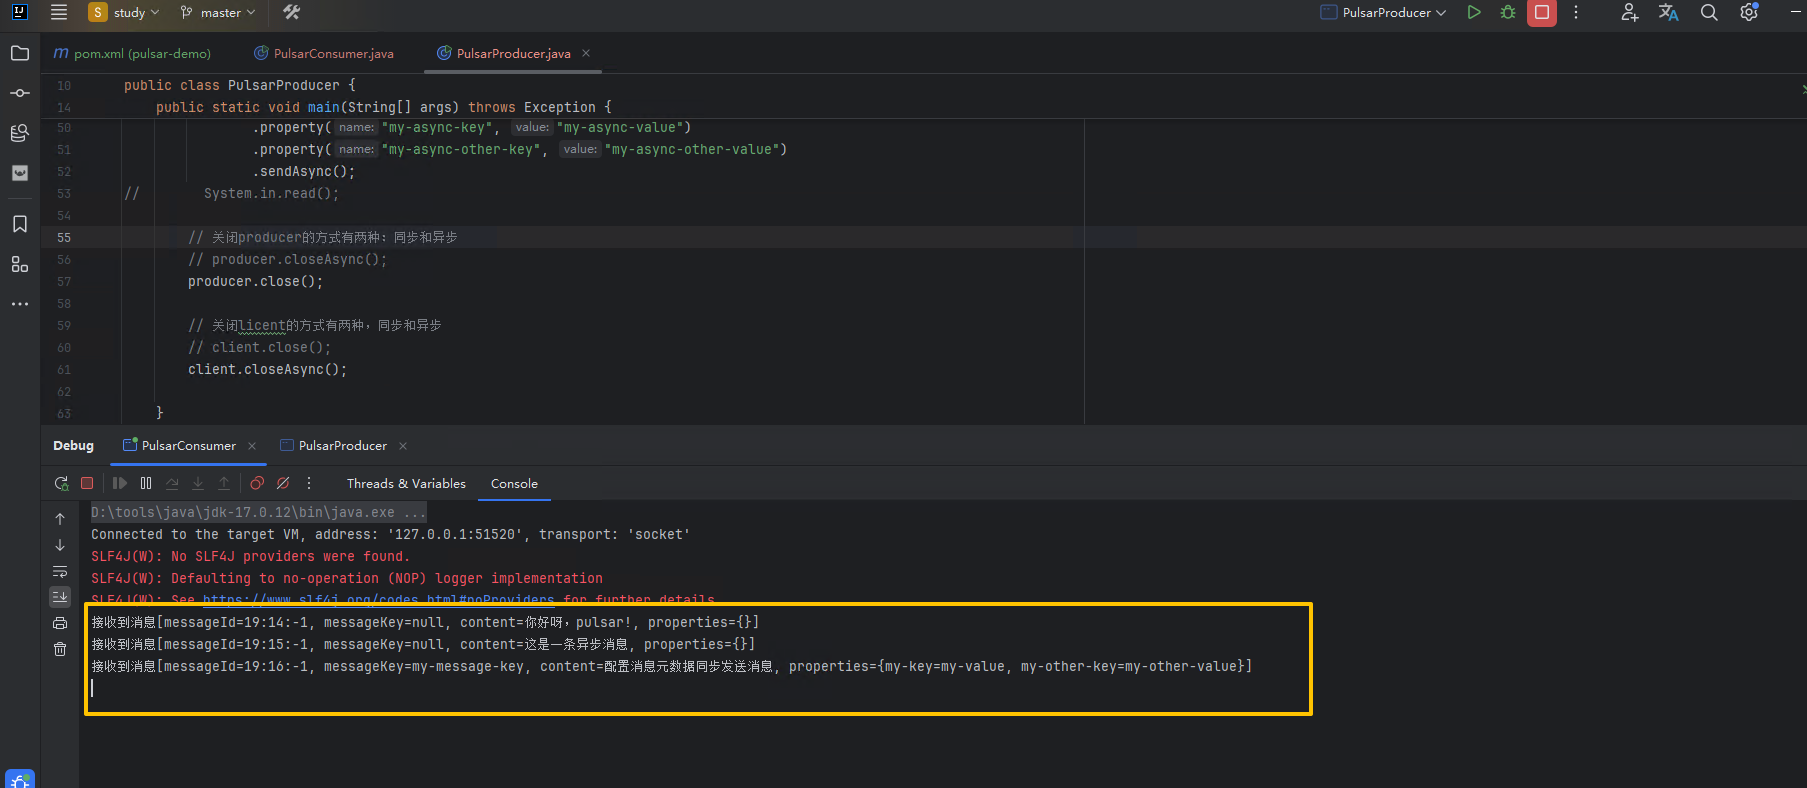
因为最后一条消息是异步发送的
producer.newMessage()
                .key("my-async-message-key")
                .value("配置消息元数据异步发送消息")
                .property("my-async-key", "my-async-value")
                .property("my-async-other-key", "my-async-other-value")
                .sendAsync();
在producer.close()之前需要确认前面的消息已经发送成功,比如将第三条第四条消息掉个顺序:
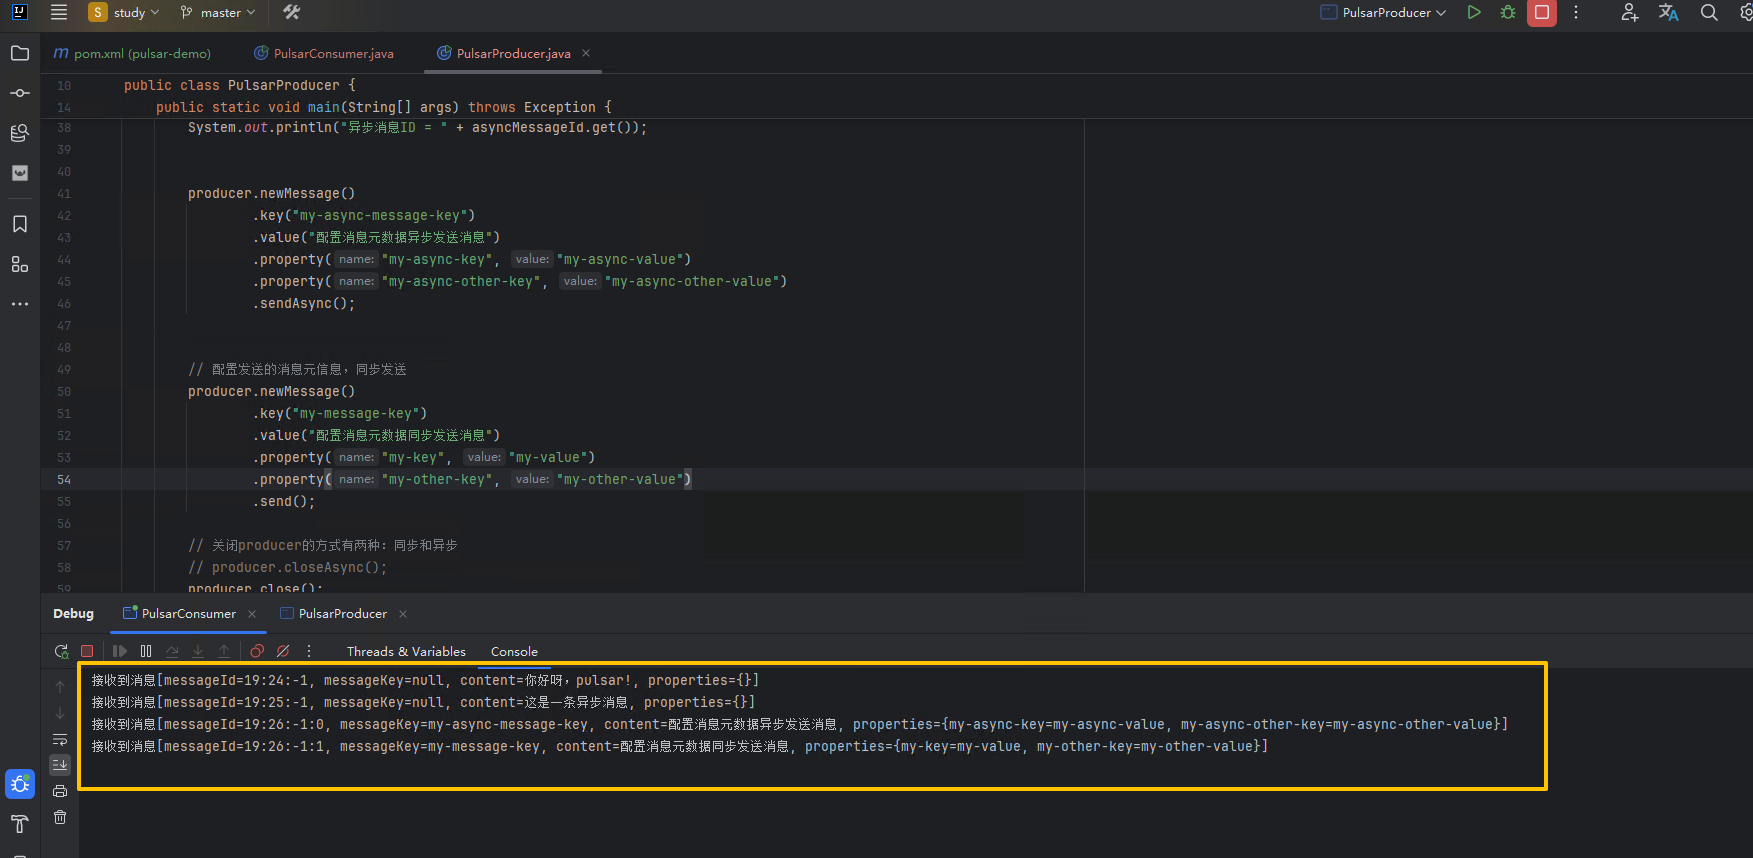
不过最保险的还是像上一条异步发送的消息那样,异步发送的结果是一个CompletableFuture对象,要保证消息发送完成,可以调一下这个对象的get方法同步等待直到拿到执行结果